If you’ve just purchased a new spinning reel, or if you’re not sure how to properly care for your current one, this blog post is for you. In it, we’ll go over some basic tips on how to clean and maintain your spinning reel so that it lasts for years to come. We’ll also touch on when it’s time to replace key parts, and how often you should perform routine maintenance. By the end of this post, you’ll know everything you need to keep your spinning reel in tip-top shape!
Clean And Maintain A Spinning Reel
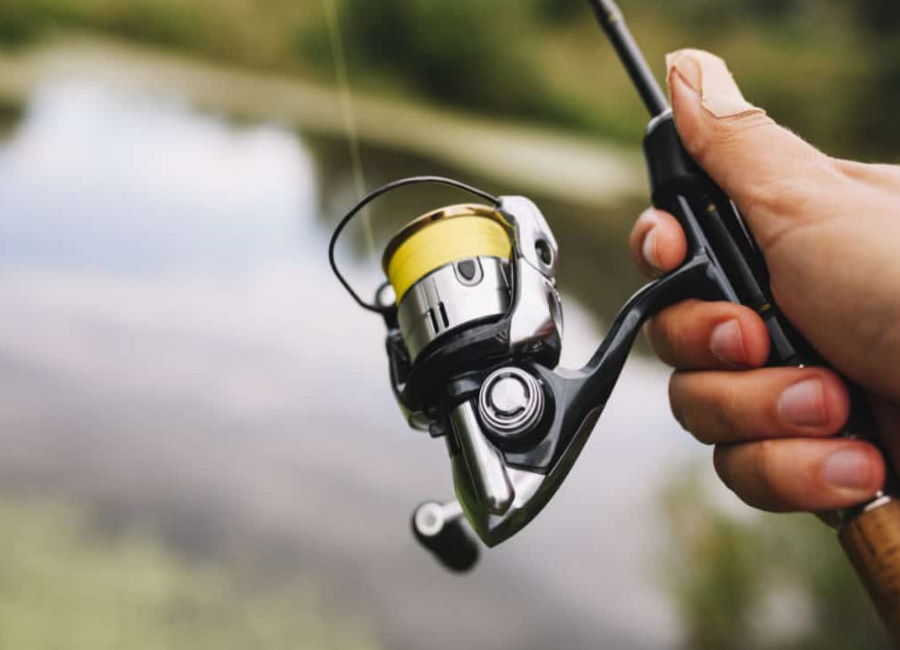
If you fish often, it’s important to keep your spinning reel in good working condition. Over time, saltwater and debris can build up on the inside and outside of the reel, causing it to function less smoothly. With a little regular cleaning and maintenance, though, you can keep your reel performing its best for many years to come.
Spinning Reel Maintenance & Cleaning: Outside
Reel maintenance and cleaning is one of the most important, yet often neglected, aspects of fishing. A clean reel not only looks good but also performs better and lasts longer. Furthermore, it is a good idea to clean your reel after every fishing trip, even if you did not catch anything. This will help to remove any saltwater or bait residue that may have built up.
Step 1: Step 1: Organize Your Tools
To get started, make sure you have all of your supplies and tools organized. This will help keep everything in order as we take apart this spinning reel!
There are many parts on a fishing reel that can be small enough to lose if they’re not careful – but there’s no need for worry because our helpful trick is using long pieces tape labeled with numbers going from 1-9 which goes back together like an assembly line when put correctly again.
Step 2: Take Your Reel Apart
Before you start to unscrew the parts of your reel, take a moment and number them somehow so that everything will go back together again in order. You can use masking tape or even better yet- tweezers!
The first step in cleaning your reel is to remove the line. This can be done by loosening the bail arm and then pulling the line out of the reel. If the line is tightly wrapped around the spool, you can use a pair of pliers to help loosen it. Next, remove the cover of the reel. On most reels, this can be done by unscrewing it.
Step 3: Thorough Cleaning
Now that the reel is exposed, you can begin to clean it. Start by using a brush to remove any built-up dirt or debris from the gears and spool. You can also use a toothpick or Q-tip to clean out any smaller crevices. Once the majority of the dirt has been removed, you can begin to rinse off the reel with clean water.
Make sure to pay special attention to the bail arm and line roller when rinsing off the reel. These are two areas that are especially prone to saltwater corrosion. After rinsing, dry off the reel with a towel.
Step 4: Greasing the Gears
After you’ve cleaned the parts of your fishing reel, use a toothpick to apply light coating of grease on all interior gears. Make sure not too coat any part that is covered with metal or it will cause damage!

Step 5: Oiling the Bearings
If you’re finding that your reel is sluggish or difficult to turn, it could be because of dirty bearings. You can either purchase a special bearing cleaning solution from the store or make yourself with lighter fluid and scrubbed brushes! After applying whichever one of these options works best for each individual situation (store bought vs homemade), spin the wheels until they are free- spinning without any resistance at all . If there’s still some sludgy residue left on their surface after this test then repeat as needed but ensure not overdoit – too much fluid might cause damage instead so watch out!
Step 6
Finally, reassemble the reel and replace the cover. Be sure to screw it in tightly so that it is water-tight. Now your reel is clean and ready for your next fishing trip!
Spinning Reel Maintenance & Cleaning: Inside
When it comes to reel maintenance, most people focus on the exterior of the reel. However, it’s just as important to clean and maintain the interior components of your reel. Here are a few tips to help you keep your reel in top condition:
Step 1: Before you can legally remove your spinning reel from the rod, it’s important to loosen up any drag and take off that pesky handle.
Step 2: Use a cloth to remove any debris from the interior parts of the reel.
Step 3: Pay special attention to the gears, making sure that they are free of debris and properly lubricated.
Step 4: Reassemble the reel and test it before you put it back into use.
FAQs
How often should you clean your spinning reel?
There is no one definitive answer to this question. Some anglers believe that you should clean your spinning reel after every use, while others only do it once a month or even less often than that. The truth is, it depends on how often you use the reel and what type of fishing you are doing. If you are primarily using your spinning reel for bait fishing in freshwater, you can probably get away with cleaning it just once a month. If you are using it for saltwater fishing, or if you are using heavier lures, you may need to clean it more often. As a general rule of thumb, if the reel starts to feel sluggish or if the line starts to tangle more often, it’s probably time for a cleaning.
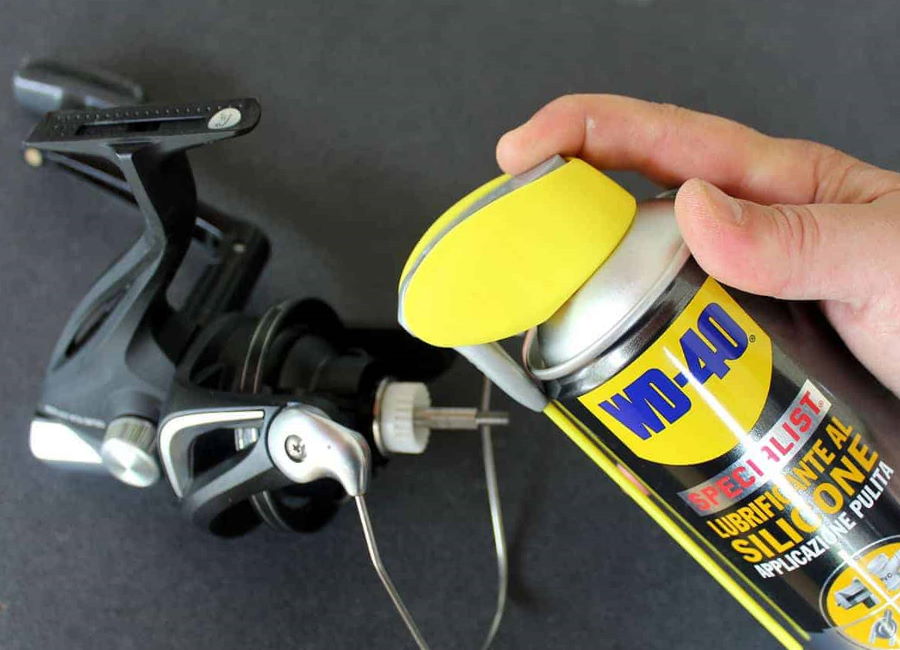
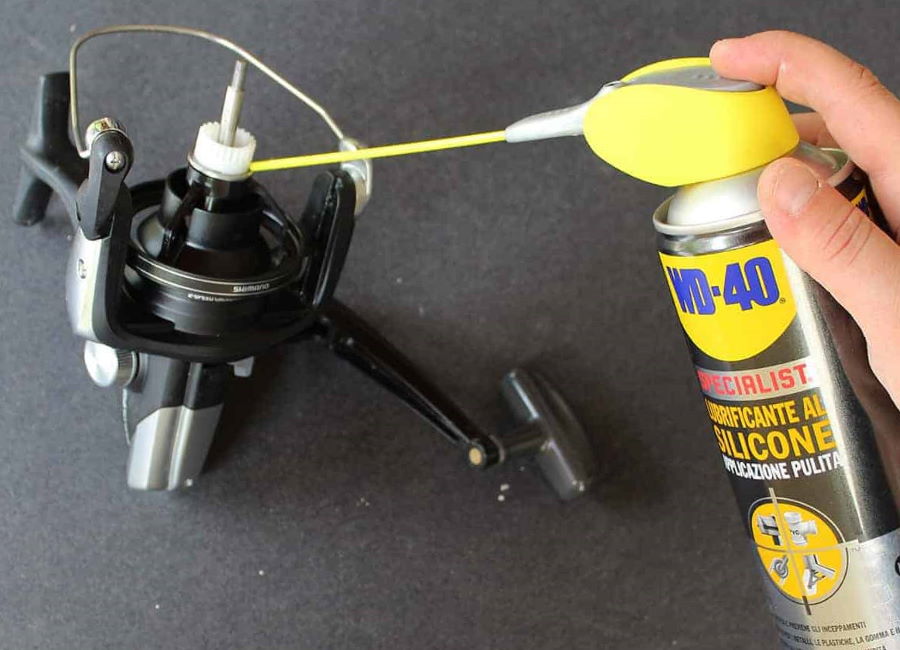
Can you use WD-40 on fishing reels?
WD-40 is a popular lubricant that can be used for a variety of purposes. Some people wonder if it can be used on fishing reels. The answer is yes, WD-40 can be used on fishing reels to help keep them lubricated and functioning properly. Just be sure to apply it sparingly, as too much WD-40 can actually gum up the works and cause more harm than good.
Conclusion
Proper cleaning and maintenance of your spinning reel is key to keeping it in good condition for years to come. Fortunately, it’s not a difficult process, and with a little effort you can keep your reel running like new. We hope this article has helped you learn how to clean and maintain your spinning reel like a pro. Are there any tips or tricks that have worked well for you? Let us know in the comments below!


