Fishing is a popular pastime enjoyed by many people. If you are new to fishing, or just want to learn a new knot, the Rapala Knot is a great option. This knot is strong and easy to tie, making it perfect for any fishing situation. In this blog post, we will show you how to tie the Rapala Knot so you can start fishing with confidence. Let’s start!
What Is A Rapala Knot?
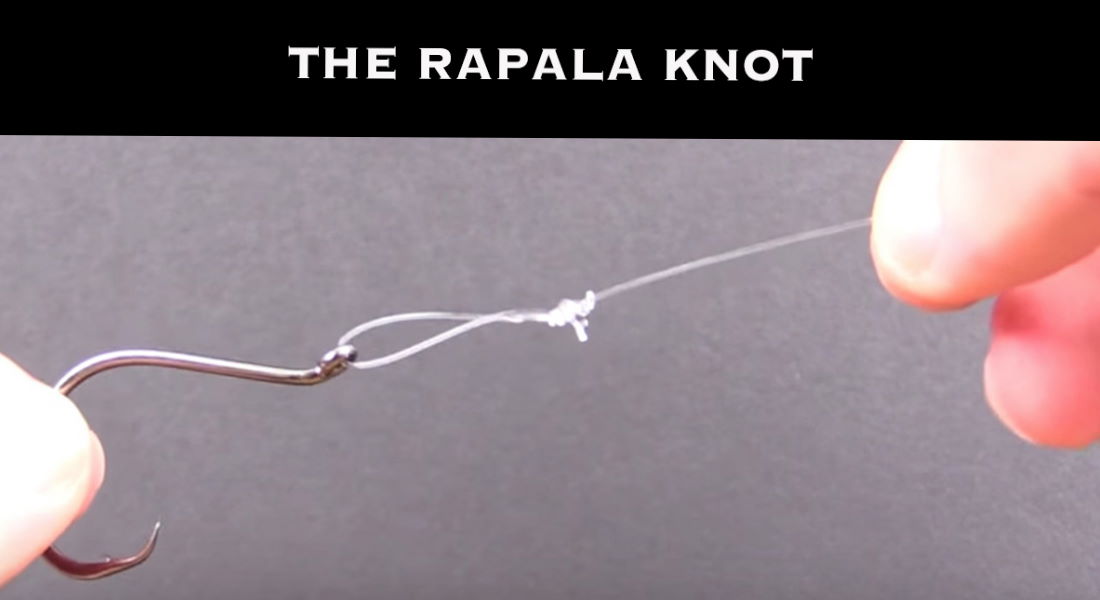
The famous and most common knot used to tie fishing hooks and swivels together is the Rapala Knot. It was created by Lauri Rapala in 1936 as a way of attaching his own line to lure. His company now sells thousands of lures each year with pre-tied Rapala Knots. There is even a Rapala Knot Hole in the wall of their main office so that all employees can perform this one simple task anytime they want. It’s become the most popular knot for this purpose.
Why Use A Rapala Knot?
For starters, it is very simple and easy to learn. Second, you can usually get away with using much less fishing line than you normally would when using other fishing knots. This equates to less weight buoying your line up in the water which is much better for small lures that require very little additional weight. The reason this knot works so well is due to the number of twists in it combined with how many lines you leave when forming it.
The Rapala Knot can be used in salt water and fresh water with ease. It’s recommended to use some sort of fishing lubricant when tying this knot so that you can get it really smooth and work some wax into the line while adding more strength. It is important, however, not to use too much lubricant because it will actually weaken the line. So just use enough so it will work smoothly, but not too much.
The Rapala Knot is preferred by many anglers because it does not get stuck on other materials such as weeds or moss which is much more likely to happen with other fishing knots. It makes it very easy for this knot to slide when needed but has the right amount of strength to hold onto whatever you’re trying to catch.
How To Tie A Rapala Knot
What to prepare
Giving your fishing line a quick tie with the Rapala Knot is an easy way to ensure that you have everything ready before starting. With this knot, all of my materials required were just some eyelets from hooks or lures and swivels in addition to any snaps, etc., making it simple enough even for beginners like myself who are sometimes prone to errors!
Detailed instructions
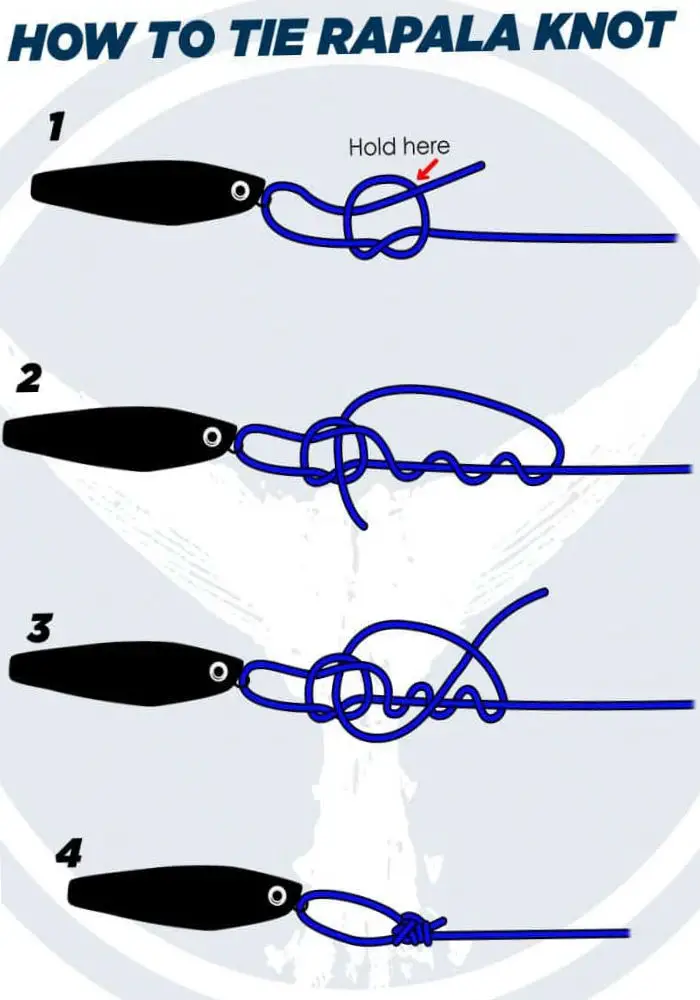
Below are 5 easy steps to handle this knot:
Step 1: Make a loop or loose overhand knot out of your line and thread the tag end through an eye at one end.
Step 2: Wrap it around the standing line three times.
Step 3: Pass the line through the second loop.
Step 4: Pass the line through the loop you just created.
Step 5: It’s easy, just pull both ends of the cord until it tightens up. The Rapala knot is a great way to keep your line taught and tangle-free!
Why You Fail To Tie A Rapala Knot
– The line, leader, and tippet are not the same stiffness
It’s all too common to buy a “one size fits all” fluorocarbon or monofilament. This not only leaves you with several different diameters on your spool but will also cause too much stretch when it comes time to tie your knot. You should take the time to match each material that you are using.
– The dropper loop is not formed properly
Forming your dropper loop is an essential part of tying a Rapala Knot correctly. If this step is not done properly it will cause issues down the road when you are trying to complete the knot. This is probably the most common reason why people have problems.
– The tag end is not wetted by saliva before tightening down your knot
The tag end should be wet before being pulled tight to tighten the knot. This helps lubricate the mono when pulling it tight thus allowing it to slide more easily off of itself during the tying of the Rapala Knot.
– The final step is not completed
The final steps to make the Rapala Knot complete are very easy but many people omit them (or simply don’t know about them). First, when you tighten down your knot it is important that you pull with constant pressure all around the standing line including in between your dropper loop and the standing line. In addition, before pulling down on your tag end you should pull down on the dropper loop to ensure maximum strength of your Rapala Knot.
– Your leader, tippet, and dropper loop are not of equal length
The dropper loop on your leader should always be longer than your tippet and the tippet should always be the shortest of your three sections.
– The tippet is too long.
Most people make tippets too long because their knot-tying skills are not great to start with, they have poor eyesight or it just plain looks better for them. I strongly discourage this since it can cause many problems such as reduced strength, tangles and you will need to add extra weight to your dropper loop. You will also have a harder time landing fish with too long of tippet.
– The tag end does not exit out of the loop.
This happens more often than you would think especially when tying smaller knots. Pay attention to the direction in which the tag end should exit out of your loop.
– The dropper loop is too long.
The dropper loop on your leader should be no longer than the length from one side of a clinch knot to another side so you can also add a bead and still cast well with this setup (image). If it’s too long you will lose strength and it will be much harder for the fish to take in.
– The line is not spooled properly.
If your line is not spooled correctly, when you begin to tie your Rapala Knot there will be slack in the line when you reach up towards your dropper loop which makes it much more difficult to tie this knot correctly.
FAQs
How strong is the Rapala Knot?
The Rapala knot is a great way to keep your line strong when you’re fighting an active fish. The three wraps of this specially designed tied can withstand more than twice the pressure that most other knots would be able, so it will hold up well in all types of fishing situations. Some anglers find the Rapala knot to be a little less effective than other knots, but it can still retain 62% of its original power.
Rapala Knot vs Palomar?
The Rapala Knot is a reliable loop knot for tying your lure, but it does have its downsides. Firstly the ties can take some time to tie and leave an extra tag end which gets stuck on debris or weeds in addition this lose fishing line won’t work with braided lines either.
The Palomar knot is a great choice for tying up large fish with monofilament or fluorocarbon fishing lines. It’s easier than the Rapala, but not as strong and will wear quicker over time because it can’t hold onto 100% of its original strength like an elastic cord could (Rapala retain 98%).
Why is tying the Rapala knot difficult?
The first time I tried to tie this knot, it was a challenge because you need both thin lines in your hands and make sure they are held tightly.
What are some tips to strengthen the Rapala knot?
The best tip is to keep your knot tight and make sure you moisten the line before pulling on it.
Besides the Rapala, which loop knots are best for fishing?
The Palomar knot, Turle Knot, Snell Knot and Blood Knot are useful alternative loop knots to the Rapala.
Conclusion
The Rapala knot is a versatile and easy-to-tie fishing lure knot that can be used with any kind of line. We hope this tutorial has been helpful, and we’d love to hear about your favorite knots as well! If you have any questions or need some help tying it up, please leave us a comment below. Good luck out there on the water!


